Jenkins is an open-source continuous integration and delivery application that makes it easy to set up automated jobs, like building and deploying code. In this post, I'll explain how you can automate testing your API every time you deploy, using the Assertible deployment testing API.
![]()
The most opportune time to run validation checks against your web app is immediately after a new deployment. This helps developers quickly find flaws in an API that may go unnoticed with traditional manual testing methods.
To get started, let's outline the process of testing an API from Jenkins:
- Create tests for your web app
- Install and start Jenkins
- Set up a Jenkins job
- View and manage API tests in Assertible
Create tests for your web app
If you don't already have a web service set up in Assertible, get started free.
First, create a few tests that validate core functionality of your API. For a more in-depth guide on testing your web app with Assertible, check out the Getting Started section. In this post, I'm testing a Node.js API running on Heroku, with these tests:

Running tests from a deployment pipeline is the recommended method to validate new features and bug fixes in your app, and provides a way to immediately find flawed or broken builds, so make sure to create reliable and automatable API tests.
Post deploy testing script
Once you've created a few tests for your web app, find the
Deployments tab of your web service. There you should see an
example curl command for calling
the Deployments API.

This command can be integrated into a CI pipeline or deployment script; when the script is executed, the tests for your API tests will be run. Keep this script handy, as we'll use it in a later section.
Install and start Jenkins
Next, let's set up a Jenkins server where the script will be run. If you already have an installation of Jenkins running, either locally or on a server, you can skip this section.
If you don't already have Jenkins running, you can download and install it for free by following the the Jenkins installation guide.
Set up a Jenkins Job
Once you have Jenkins running, the next step is to create a new job. In Jenkins, a job is basically a set of steps and commands that describe how to build and deploy your application.
On your Jenkins dashboard, click Create new jobs:

Configure your new job by adding a name, and select Freestyle project as the type:

A freestyle project is the simplest way to illustrate automated API testing from Jenkins, but note that you can use any existing Jenkins job, since all you need to do is add a Build Step.
Add a build step
With a Jenkins job created, you can now add a build step. This build step will execute a shell command that calls the post deploy testing script you got in the first section.
In your Jenkins project dashboard, click Add build step and select the Execute shell option:

Now here comes the fun part! The shell command will call your Assertible deployments script and automatically run your API tests. Grab the deployment script from the first section, it should look like this:
curl -u YOUR_API_TOKEN: https://assertible.com/deployments -d'{
    "service": "YOUR_SERVICE_ID",
    "version": "v1"
}'
Add your script to the text input for the shell command in Jenkins:

In a real-world scenario, you will likely be adding this command as a Build Step in an existing Jenkins job. In either case, the script should be run right after your API is deployed.
As a refresher, the post-deploy testing script makes a POST request
to Assertible, which will automatically run tests against your API. If
you're deploying to a staging or qa environment, you can use
the environment parameter to specify which URL your tests will
run against. Check out
the Deployments API documentation to see
more options and examples.
Pro tip! To keep the senstive information in the command provide, like your `ASSERTIBLE_API_TOKEN` and `ASSERTIBLE_SERVICE_ID`, you can use environment variables in Jenkins.
Running the job
Alright! The Jenkins job is set up with a build step to run your API tests. Now, let's run the build to make sure everything is set up correctly.
On your Jenkins job dashboard, click Build Now:

This will start a build and begin going through the build steps. If the shell command succeeds, you should see a blue ball indicating a successful build.
Navigate to the console output tab of the build to see the details of the
POSTrequest, including theidof the deployment that was created:
If you see something like the image above, then congratulations! You now have a Jenkins build that will continuously test your web services. In the next sections, I'll discuss how to manage your API tests in Assertible, set up failure alerts, and add status checks to your GitHub pull requsts.
API test results in Assertible
Back in your Assertible dashboard, find the Results tab of your web service. The results of the tests executed from Jenkins will be available, with all of the details about the assertions:
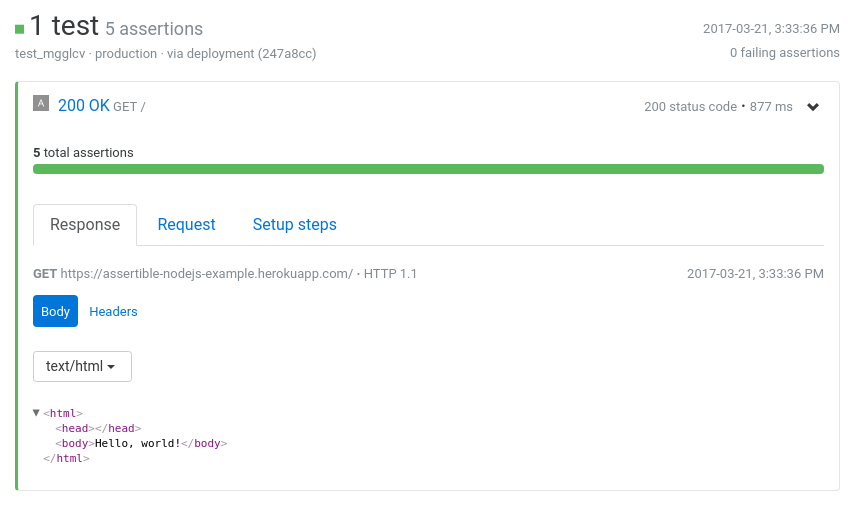
If you look at the details near the top, you'll see the results were executed via Deployment. Learn more about the different options for running post-deploy API tests in the docs.
Configure test failure notifications
One of the most important parts of continuous testing is getting alerted of web service failures. Assertible has several options you can use to customize how and when you're notified of test failures.
Email hooks
Email hooks are enabled by default to send an email when a test fails.
Zapier hooks
One last method of receiving alerts is with the Zapier integration. The Zapier integration allows to trigger a Zap when your tests fail, so you can do almost anything the test result data. You can even open an issue on GitHub when API tests fail.
Slack notifications
A great alternative to email notifications is to install the Slack integration to send a message to a channel when tests fail. Slack notifications are ideal for teams where multiple people are in charge of responding to web service failures.

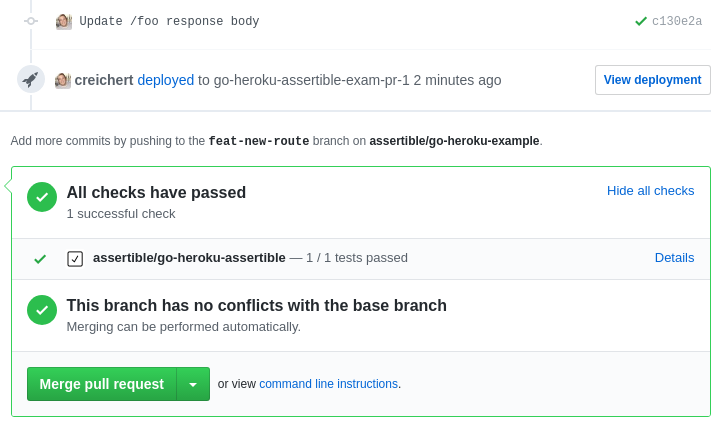
Bonus: GitHub status checks for API test results
This is a very basic example of a Jenkins job. In many cases, Jenkins is used to build, test, and deploy code changes from a GitHub repository as a CI/CD server. Assertible can add a GitHub status checks to your pull requests that show the result of your API tests.
If you use GitHub, you can enable status checks for your API tests
by
connecting your web service to a GitHub repo,
and adding the github: true parameter to your deployment
script. Learn more
about
setting up GitHub status checks.
Wrapping up
Using Jenkins and Assertible, it's easy to continuously test your web services after every deployment or on a schedule interval.
More resources and tutorials
- Add post-deploy smoke tests to any Codeship pipeline
- Why you should add API testing to your continuous integration pipeline
- Tutorial: Automate smoke tests for a Go API on Heroku
- Docs: API test automation in Assertible
Have any questions or comments? I'd love to hear it! Hit me up on Twitter or reach out directly.
:: Cody Reichert
Categories
The easiest way to test and
monitor your web services
Reduce bugs in web applications by using Assertible to create an automated QA pipeline that helps you catch failures & ship code faster.
Recent posts
Tips for importing and testing your API spec with Assertible 05/26/2020
New feature: Encrypted variables 10/30/2019
New feature: Smarter notifications 5/17/2019